Credit card-sized computers
Computers do not have to be big or expensive. A wide range of small and cheap computers are available. These small, credit-sized computers allow students to learn basics of computer programming and electronics, and make their own electronic devices easily. School children all over the world[1], such as US[2], UK[3][4] and Taiwan[5], are actively learning how to code and DIY their invention with these credit-sized computers.
Two popular credit-sized computers are Arduino[6] and Raspberry Pi[7]. They are suitable for code beginners to create their own DIY inventions.
Arduino
Arduino[6] is an open-source prototyping platform based on easy-to-use hardware and software. Arduino boards (Figure 1) are able to read inputs: light on sensor, a finger on a button, or a Twitter message; and turn it into an output: activating a motor, turning on an LED, publishing something online. You can tell your board what to do by sending a set of instructions to the microcontroller on the board.
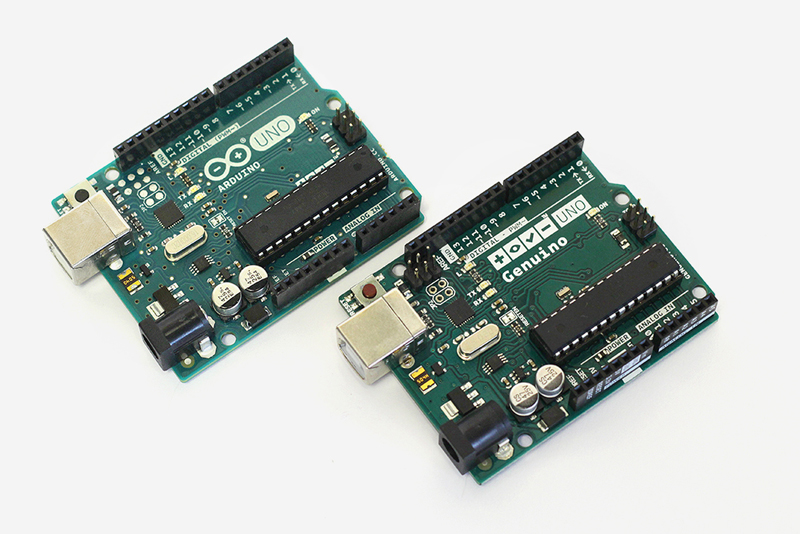
(Source: https://www.arduino.cc/en/Main/ArduinoBoardUno)
You may wonder how school children who know nothing about programming can write complex instructions to control the board. Programming an Arduino is not especially difficult, you can use Arduino Programming Language [7] and the Arduino Software (IDE) [8]. The Arduino Software (IDE) (Figure 2) is easy-to-use for beginners, yet flexible enough for advanced users to take advantage of as well.
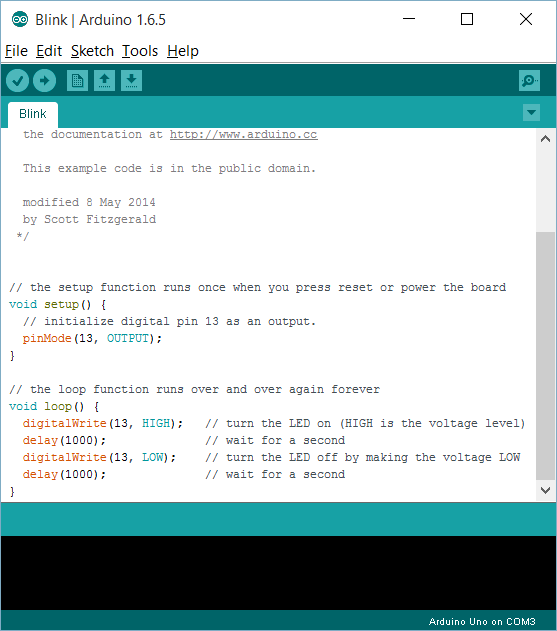
(Source: https://www.arduino.cc/en/Guide/Windows)
For example, to blink an LED on the Arduino Board, you can first set up a circuit as shown in Figure 3:
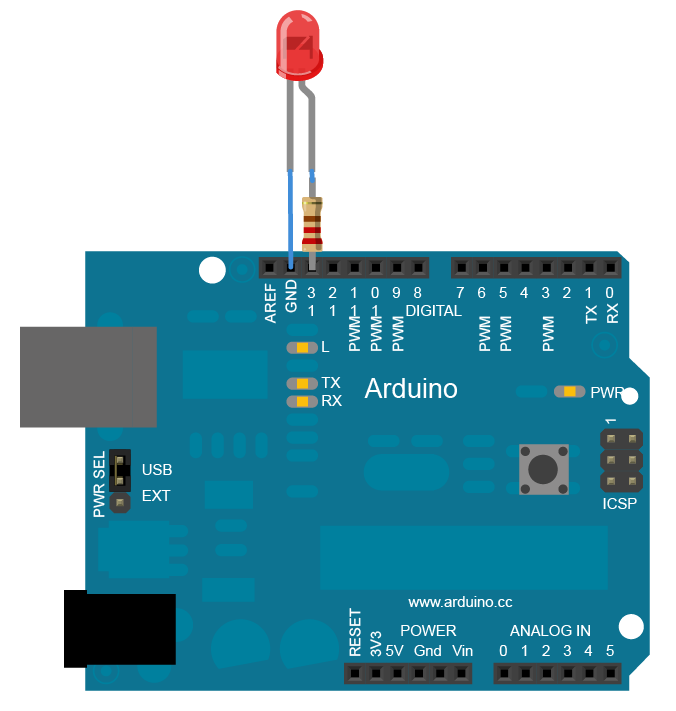
(Source: https://www.arduino.cc/en/uploads/Tutorial/ExampleCircuit_bb.png)
Next, to program it to blink, you only have to write the following codes in the Arduino Software:
  void setup() {
    pinMode(13, OUTPUT);
  }
  void loop() {
    digitalWrite(13, HIGH);
    delay(1000);
    digitalWrite(13, LOW);
    delay(1000);
  }
By only these few lines of code, the LED on the Arduino Board blinks.
Does it sound too difficult for you? If you are looking for a more visual or easy method, especially for primary school students, a visual programming tool Scratch for Arduino (S4A) [9] is available as a groundwork for students or beginners programming an Arduino by drag and drop actions to create programs (Figure 4).
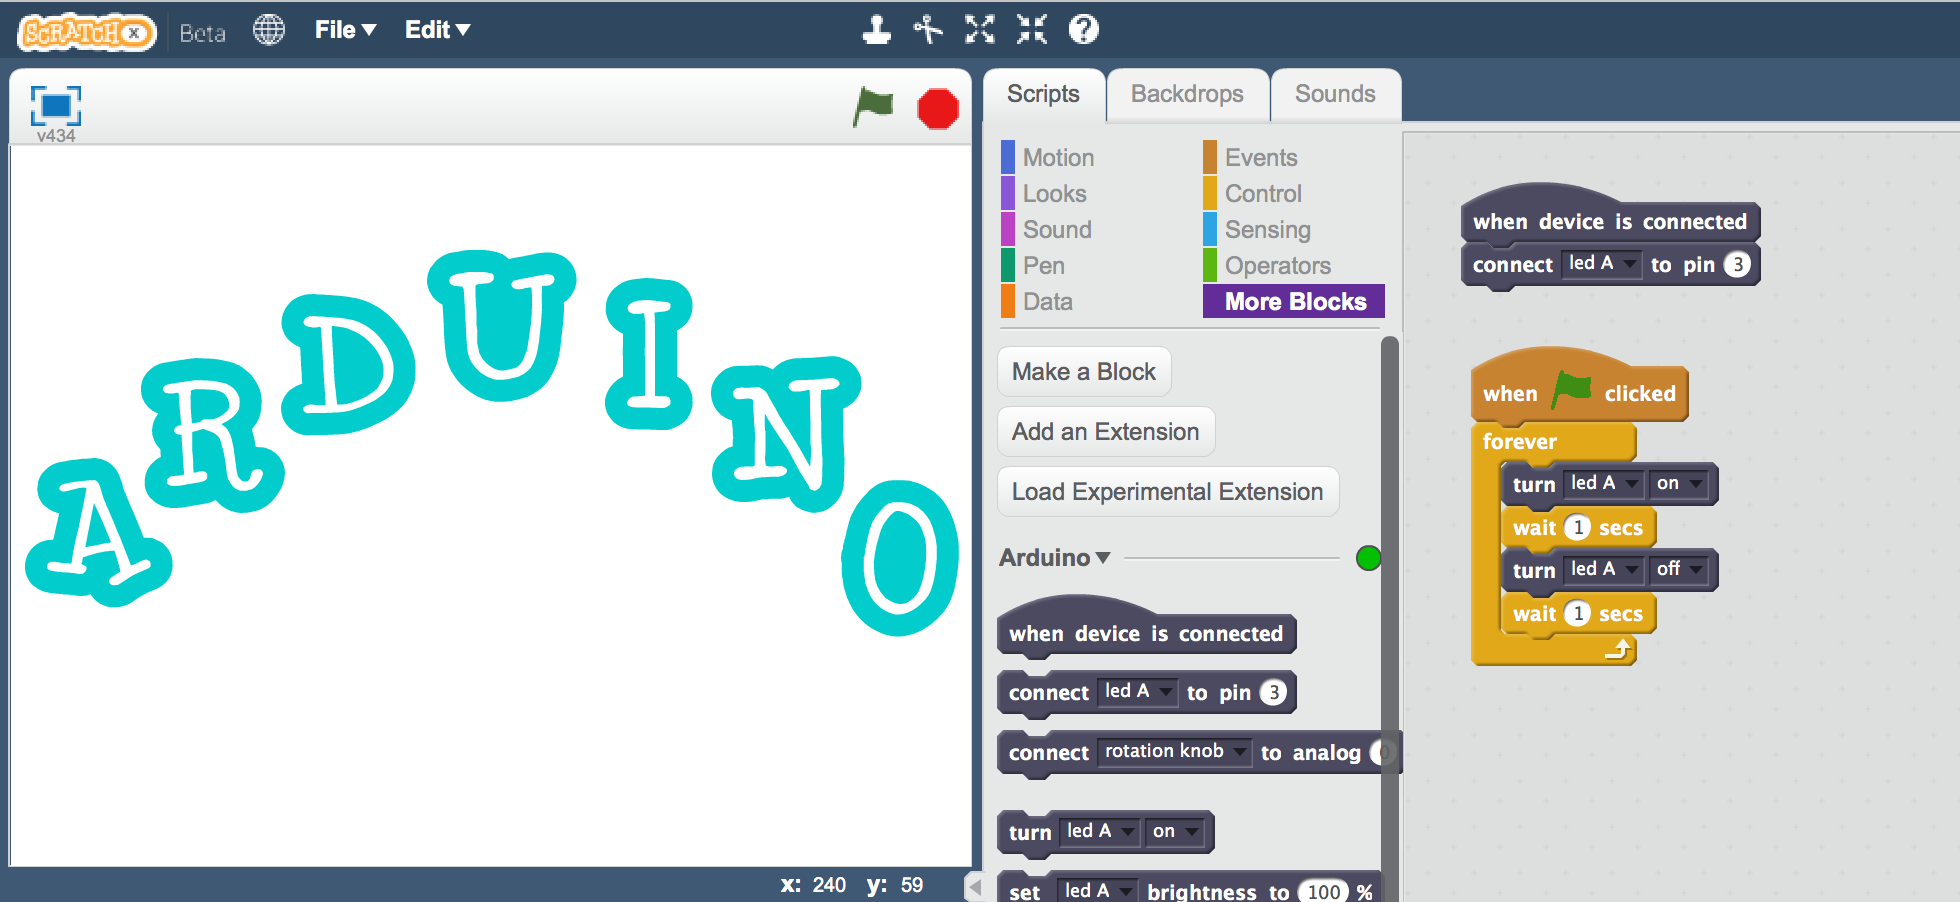
(Source: https://blog.arduino.cc/2015/05/11/scratch-extension-for-arduino/)
To blink the LED like the example above, it can be done visually by placing action blocks together as shown in Figure 5.
(Source: http://www.instructables.com/file/FTLPMWGHCV97K30)
Raspberry Pi
The Raspberry Pi[6] is a low cost, credit-card sized computer (Figure 6) that plugs into a computer monitor or TV, and uses a standard keyboard and mouse. It is a capable little device that enables people of all ages to explore computing, and to learn how to program in languages like Scratch and Python. It is capable of doing everything you'd expect a desktop computer to do, from browsing the internet and playing high-definition video, to making spreadsheets, word-processing, and playing games.
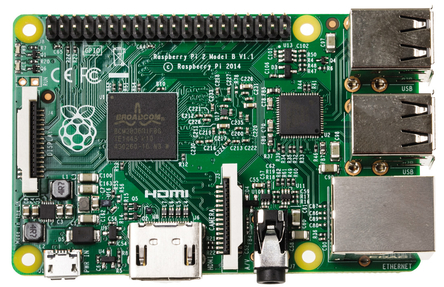
(Source: http://hken.rs-online.com/web/p/processor-microcontroller-development-kits/8326274/)
To blink an LED on the Raspberry Pi, an LED can be connected to a Raspberry Pi as shown in Figure 7.

(Source: http://simplesi.net/scratchgpio/scratchgpio-1st-project/)
To program it, only a few lines of code are needed.
import RPi.GPIO as GPIO
import time

GPIO.setmode(GPIO.BOARD)
GPIO.setup(7, GPIO.OUT)

while True:
  GPIO.output(7,True)
  time.sleep(1000)
  GPIO.output(7,False)
  time.sleep(1000)
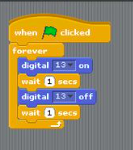
If this sounds too complex, especially for primary school students, a visual programming tool Scratch[11] (with ScratchGPIO expansion package[12]) is available for programming the Raspberry Pi by drag and drop actions.

(Source: http://simplesi.net/scratchgpio/scratchgpio-1st-project/)
Invention for Schools using credit card-sized computers
With Arduino and Raspberry Pi, you can create electronic devices by yourself with simple programming instructions and user-friendly interfaces. You may use it to detect whether there is someone in the classroom, you may make a program to play your school song, you may create some education tools to assist teaching and learning... What else can you think of? Come and join the competition and make contribution to your school.
References
- [1] Jane Wakefield (2015, 12 March). BBC gives children mini-computers in Make it Digital scheme. BBC http://www.bbc.com/news/technology-31834927
- [2] Jon Fingas (2015, February 18). MIT's light-up robot garden teaches you how to code. engadget, http://www.engadget.com/2015/02/18/mit-robot-garden/
- [3] Auren Orsini (2014, April 8). Raspberry Pi's Eben Upton: How We're Turning Everyone Into DIY Hackers. readwrite, http://readwrite.com/2014/04/08/raspberry-pi-eben-upton-builders
- [4] Menchie Mendoza (2015, July 9). BBC Wants A Million Kids To Learn Coding Using This Pocket-Sized Microcomputer. Tech Times, http://www.techtimes.com/articles/67009/20150709/bbc-wants-a-million-kids-to-learn-coding-using-this-pocket-sized-microcomputer.htm
- [5] 鄭婷方 (2014年10月20日). 遠見/美國「一小時學程式」熱潮 延燒全球. ETtoday生活新聞, http://www.ettoday.net/news/20141020/409878.htm
- [6] Arduino. https://www.arduino.cc/
- [7] Raspberry Pi - Teach, Learn, and Make with Raspberry Pi. https://www.raspberrypi.org
- [8] Arduino - Language Reference. https://www.arduino.cc/en/Reference/HomePage
- [9] Arduino - Download the Arduino Software https://www.arduino.cc/en/Main/Software
- [10] Scratch for Arduino S4A. http://s4a.cat
- [11] Scratch. https://scratch.mit.edu
- [12] Scratch (with ScratchGPIO expansion package). http://cymplecy.github.io/scratch_gpio/